Doom (2016)
Runes are special items earned by completing Rune Trials. Each rune can be equipped and placed into one of the Praetor Suit's three Rune Slots, though only one is unlocked by default. Completing more trials unlocks the remaining slots at four and seven trials respectively.
Runes can grant combat bonuses, from increasing item pickup radius to keeping enemies stunned for longer. Any rune can be placed in any slot allowing for customization to suit the player's preferred style.
There are twelve total Runes that can be found and unlocked, with two Rune Trials per level starting with the Argent Facility (Level 4) and ending with Lazarus Labs (Level 9).
Like weapons and weapon mods, Runes can also be mastered to provide greater benefits.
| Rune | Trial Location | Benefit | Mastery Task | Mastery Benefit |
|---|---|---|---|---|
| Vacuum | Argent Facility | Increases the range for absorbing dropped items (ammo and health) | Absorb 300 items. | Further increases range for absorbing items. |
| Dazed and Confused | Argent Facility | Increases how long enemies remain in a stagger state. | Perform 25 Death From Above Glory Kills | Enemy staggers last even longer. |
| Ammo Boost | Argent Energy Tower | Increases the amount of ammo gained from items and enemies. | Pick up 500 ammo items. | BFG ammo has a chance to drop from enemies. |
| Equipment Power | Argent Energy Tower | Increases the effectiveness of Equipment items. | Use Equipment (grenades, holograms, etc.) 30 times. | Further increases the effectiveness of Equipment items. |
| Seek and Destroy | Kadingir Sanctum | Glory Kill enemies from much farther away. | Glory Kill 75 enemies. | Further increases the range at which you can do a Glory Kill. |
| Savagery | Kadingir Sanctum | Perform Glory Kills faster. | Perform 25 unique Glory Kills while this rune is equipped. | Further increases the speed of Glory Kills. |
| In-Flight Mobility | Argent Facility (Destroyed) | Provides a significant increase in control over in-air movement when doing a double jump. | Kill 30 demons while in mid-air (includes Glory Kills and Chainsaw kills performed while jumping) | Applies air control to single jumps. |
| Armored Offensive | Argent Facility (Destroyed) | Glory Kills drop armor. | Pick up 2500 points of armor. | More armor drops per Glory Kill. |
| Blood Fueled | Advanced Research Complex | Move faster for a short time after performing a Glory Kill. | Kill 50 enemies while speed boosted. | Speed boost upon Glory Kill lasts longer. |
| Intimacy is Best | Advanced Research Complex | Increases the damage resistance of staggered demons, making them more Glory Kill friendly. | Stagger 100 demons. | Demons stagger off less damage. |
| Rich Get Richer | Lazarus Labs | Firing your standard weapons will not cost Ammo when you have 100 or more Armor. | Max out your Armor 12 times. | Rich Get Richer activates at 75 or higher Armor. |
| Saving Throw | Lazarus Labs | Get one chance to survive a death blow and recover health. This resets on death. | Kill 10 demons while Saving Throw's health recovery is active. | Get an additional Saving Throw per life. |
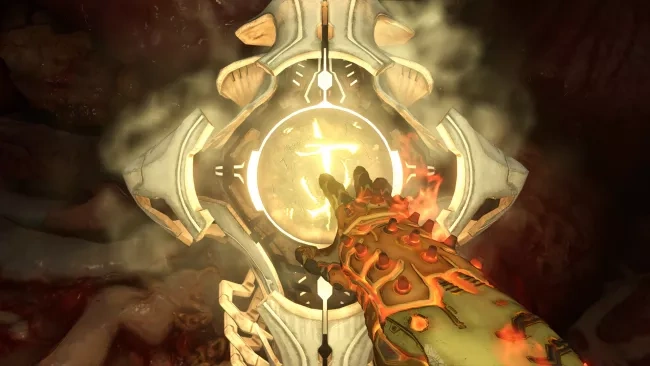
The Trials take place in what looks like a dark, nighttime, almost dreamlike area within Hell. There are three different trial arenas:
- A flat circle about two hundred feet across,
- A roughly square multi-level arena with walls and several stairways that looks like part of a ruined castle,
- A multi-part obstacle course over a chasm where the player must race to an altar.
The square arena is more common than the other two. All Trials limit the player to only one weapon, which may or may not have a mod fitted (if so, it will be in its default state with no upgrades), and all have time limits of one kind or another: either a static limit, or a short timer which is increased by performing certain actions. Equipment is not allowed. Other common rules that may apply include having 1 health, or in a couple of cases, having a limited amount of time to move after a kill before losing vertical movement (jumping is still possible in this state). Some trials are more difficult than others, and hence may require special strategies. The jump boots still work in the Trials, which is important for finishing the obstacle course trials, and they help with the Seek and Destroy trial, which requires the player to kill three Hell Knights using the Death from Above Glory Kill specifically.
Savagery is generally regarded as the worst choice of Rune since its only effect is decreasing the amount of time the Slayer is invincible for while performing a Glory Kill. Dazed and Confused and Intimacy is Best are primarily useful for unlocks that require specific Glory Kills, with the latter good for enemies such as Barons of Hell that are hard to place in a stagger state without accidentally killing them. Of note is that Blood Fueled and Armored Offensive trigger on kills with the Chainsaw as well as normal Glory Kills.
Equipment Power's description does not really detail what the Rune does: while it is simply a damage buff for regular grenades, it upgrades the Hologram so its decoy Plasma Rifle deals actual damage, increases the hologram's duration and prevents it being destroyed by enemies. Siphon Grenades are no longer limited to refilling health: once the health bar is filled, they will switch to giving armor.
Kills in Rune Trials do not count towards achieving a weapon's Mastery.
Doom Eternal
Runes return in Doom Eternal, but are altered somewhat. While Runes are still found in the environment (this time as floating Makyr devices), there are no Rune Trials: on encountering one of the devices, the player can simply choose which of the nine available Runes that they wish to unlock. The first three Rune unlocks each unlock a Rune Slot in the inventory.
There is no longer a levelling system for Runes: they always operate in the same way.
| Rune | Benefit |
|---|---|
| Savagery | Perform Glory Kills faster. |
| Seek and Destroy | Launch into a Glory Kill from much further away. |
| Blood Fueled | Gain a speed boost after performing a Glory Kill. (Also triggers on kills with the Chainsaw and Crucible) |
| Air Control | Greatly increase movement control while in the air. |
| Dazed and Confused | Increases how long enemies remain in a stagger state. |
| Saving Throw | Survive a death blow and briefly slow down time, giving you a chance to recover. |
| Chrono Strike | Hold the weapon mod button in mid-air to temporarily slow down time. Once the Rune is fully drained, you'll need to wait for it to recharge. |
| Equipment Fiend | Enemies killed by equipment or while under the influence of equipment will decrease the recharge time. |
| Punch and Reave | Enemies killed by a Blood Punch shockwave drop health. |
The Ancient Gods - Part 1 adds a new type of Rune called a Support Rune. These are only useable in the DLC. There are three available, which are equipped to their own slot which unlocks when the player acquires one of them. They cannot be equipped in the normal Rune slots.
| Rune | Benefit |
|---|---|
| Desperate Punch | Blood Punch deals double damage when your health is 75 or less. |
| Take Back | When a demon causes an Extra Life to activate, it can be killed within a short time to gain Extra Life back. |
| Break Blast | Destroying a Weak Point generates a concussive blast. |
Take Back cannot be equipped in Ultra-Nightmare or Extra Life mode.
Trivia
- Saving Throw comes from the Dungeons and Dragons role-playing game, which often makes players roll dice to have their characters avoid a harmful magical effect or save themselves from a dungeon trap.
- A few of the runes could possibly be references to famous songs. The Dazed and Confused rune could be named after the Led Zeppelin song of the same name. The same is true with the rune named Seek And Destroy, which probably is a reference to the Metallica song of the same name.