ScaleyFoxy (talk | contribs) No edit summary |
m (→Records: clean up) |
||
| (19 intermediate revisions by 3 users not shown) | |||
| Line 1: | Line 1: | ||
| ⚫ | |||
{{map|slot=MAP24}} |
{{map|slot=MAP24}} |
||
| − | '''MAP24: Gaia's Temple''' is the twenty-fourth map of the [[megawad]] [[Scythe 2]]. It was designed by [[Erik Alm]] and uses the [[ |
+ | '''MAP24: Gaia's Temple''' is the twenty-fourth map of the [[megawad]] [[Scythe 2]]. It was designed by [[Erik Alm]] and uses the [[music]] track "Dungeon (No 21)" from Daggerfall". |
| + | [[file: |thumb|300px|Map of **]] <br clear="left"/> |
||
| − | ==Strategy== |
||
| ⚫ | |||
| − | |||
| − | [[ |
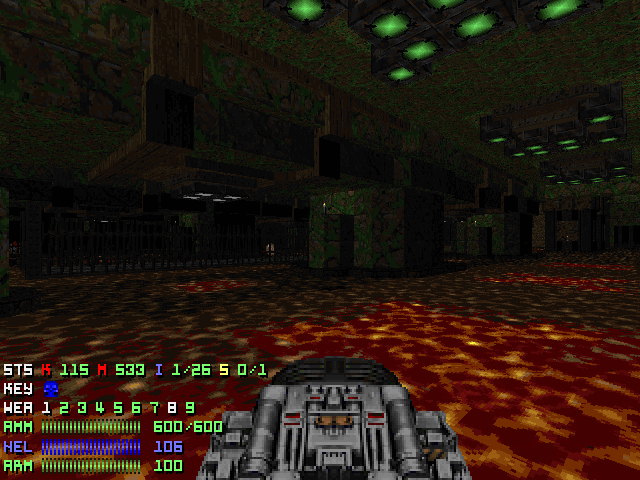
+ | [[file:Scythe2-map24-lava.png|thumb|300px|MAP24, lava]] |
| − | |||
| − | |||
| ⚫ | |||
| ⚫ | |||
===Secrets=== |
===Secrets=== |
||
| + | #Once you make it to the Switch that lowers the Red Skull Key in the wall and outside in the middle, go to the window area where you can drop back down to the start zone. You shoud try to land on the ledge where the green torch is. Now stay close to the wall and move to the starting zone and try to run over to the tower platform in the middle, then carefully navigate your way to the other side and try to run onto the next ledge. Once you're on the ledge, follow it to the green torch: Behind it you will see a hole in the wall (SECONDARY Option: get an Arch-Vile to assist you; note that this secret is hard to get and might not be worth the effort) (Reward: Invulnerability Sphere) |
||
| − | # |
||
| − | |||
==Speedrunning== |
==Speedrunning== |
||
| ⚫ | |||
| − | |||
| − | ===Routes and tricks=== |
||
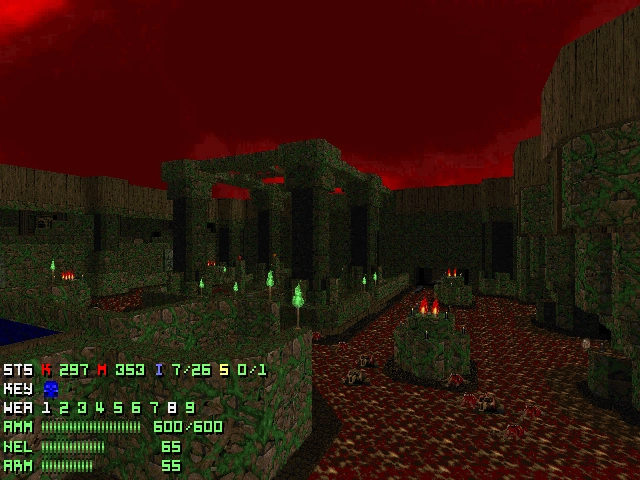
| − | [[Image:Scythe2-map24-ensemble.png|thumb|300px|MAP24, ensemble]] |
||
===Records=== |
===Records=== |
||
| Line 26: | Line 18: | ||
The [[Compet-N]] records for the map are: |
The [[Compet-N]] records for the map are: |
||
| + | {| class="WikiaTable" |
||
| − | {| {{prettytable}} |
||
!Run||Time||Player||Date||File||Notes |
!Run||Time||Player||Date||File||Notes |
||
|- |
|- |
||
| − | |[[UV speed]]|| || || ||{{competnftp|**|**}}|| |
+ | |[[UV speed]]|| || || ||{{External Link|site=competnftp|file_path=**|**}}|| |
|- |
|- |
||
|[[NM speed]]|| || || || || |
|[[NM speed]]|| || || || || |
||
| Line 49: | Line 41: | ||
===Map data=== |
===Map data=== |
||
| − | [[ |
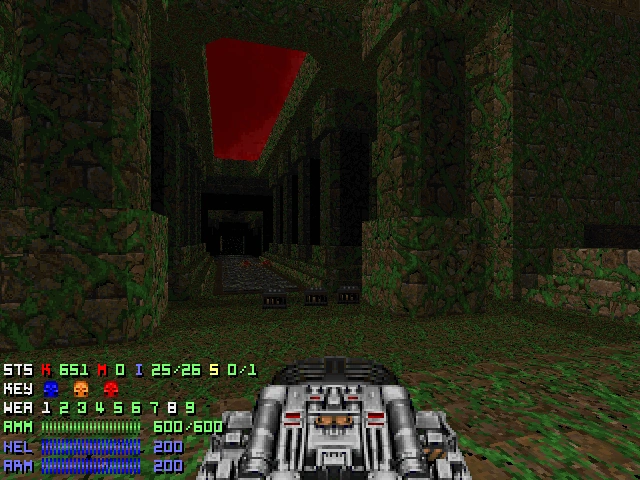
+ | [[file:Scythe2-map24-end.png|thumb|300px|MAP24, end]] |
| + | {| class="WikiaTable" |
||
| − | {| {{prettytable}} |
||
| − | |[[Things]]|| |
+ | |[[Things]]||549 |
|- |
|- |
||
| − | |[[Vertices]]|| |
+ | |[[Vertices]]||11249 |
|- |
|- |
||
| − | |[[Linedefs]]|| |
+ | |[[Linedefs]]||11322 |
|- |
|- |
||
| − | |[[Sidedefs]]|| |
+ | |[[Sidedefs]]||19409 |
|- |
|- |
||
| − | |[[Sectors]]|| |
+ | |[[Sectors]]||2022 |
|} |
|} |
||
===Things=== |
===Things=== |
||
| + | {| class="WikiaTable" |
||
| − | {| {{prettytable}} |
||
| − | !Monsters||[[I'm Too Young To Die|ITYTD]] and [[Hey, Not Too Rough|HNTR]]||[[Hurt Me Plenty|HMP]]||[[Ultra-Violence|UV]] and [[Nightmare!|NM]] |
+ | !Monsters||[[I'm Too Young To Die|ITYTD]] and [[Hey, Not Too Rough|HNTR]]||[[Hurt Me Plenty|HMP]]||[[Ultra-Violence|UV]] and [[Nightmare!|NM]]||[[Multiplayer|MP]] on [[Ultra-Violence|UV]] |
|- |
|- |
||
| − | |[[Arachnotron]]s|| || || |
+ | |[[Arachnotron]]s||3 ||3 ||3 ||3 |
|- |
|- |
||
| − | |[[Arch-Vile]]s|| || || |
+ | |[[Arch-Vile]]s||14 ||15 ||28 ||28 |
|- |
|- |
||
| − | |[[Baron of Hell|Barons of Hell]]|| || || |
+ | |[[Baron of Hell|Barons of Hell]]||32 ||34 ||34 ||34 |
|- |
|- |
||
| − | |[[Cacodemon]]s|| || || |
+ | |[[Cacodemon]]s||4 ||4 ||4 ||4 |
|- |
|- |
||
| − | |[[Chaingunner]]s|| || || |
+ | |[[Chaingunner]]s||96 ||96 ||96 ||96 |
|- |
|- |
||
| − | |[[ |
+ | |[[Cyberdemon]]s||5 ||6 ||7 ||7 |
|- |
|- |
||
| − | |[[ |
+ | |[[Demon]]s||1 ||1 ||1 ||1 |
|- |
|- |
||
| − | |[[ |
+ | |[[Hell Knight]]s||63 ||63 ||63 ||63 |
|- |
|- |
||
| − | |[[ |
+ | |[[Imp]]s||115 ||115 ||115 ||115 |
|- |
|- |
||
| − | |[[ |
+ | |[[Mancubus|Mancubi]]||24 ||24 ||24 ||24 |
|- |
|- |
||
| − | |[[ |
+ | |[[Pain Elemental]]s||2 ||2 ||2 ||2 |
|- |
|- |
||
| − | |[[ |
+ | |[[Revenant]]s||268 ||268 ||268 ||268 |
|- |
|- |
||
| − | |[[ |
+ | |[[Wolfenstein SS]]||7 ||7 ||6 ||6 |
|- |
|- |
||
| ⚫ | |||
| ⚫ | |||
|- |
|- |
||
| − | |[[ |
+ | |[[Spiritual armor|Armor bonuses]]|| || || || |
|- |
|- |
||
| − | |[[ |
+ | |[[Backpack]]s||3 || || || |
|- |
|- |
||
| − | |[[ |
+ | |[[Berserk pack]]s|| || || || |
|- |
|- |
||
| − | |[[ |
+ | |[[Blue armor]]s||4 || || || |
|- |
|- |
||
| − | |[[ |
+ | |[[Computer map]]s|| || || || |
|- |
|- |
||
| − | |[[ |
+ | |[[Green armor]]s||3 || || || |
|- |
|- |
||
| + | |[[Health potion|Health bonuses]]|| || || || |
||
| ⚫ | |||
|- |
|- |
||
| − | |[[ |
+ | |[[Blur artifact|Invisibilities]]||1 || || || |
|- |
|- |
||
| − | |[[ |
+ | |[[Invulnerability|Invulnerabilities]]||6 || || || |
|- |
|- |
||
| − | |[[ |
+ | |[[Light amplification visor|Light goggles]]|| || || || |
|- |
|- |
||
| − | |[[ |
+ | |[[Medikit]]s||23 || || || |
|- |
|- |
||
| − | |[[ |
+ | |[[Megasphere]]s||12 || || || |
|- |
|- |
||
| − | |[[ |
+ | |[[Radiation suit]]s|| || || || |
|- |
|- |
||
| − | |[[ |
+ | |[[Soul Sphere]]s||7 || || || |
|- |
|- |
||
| − | |[[ |
+ | |[[Stimpack]]s|| || || || |
|- |
|- |
||
| ⚫ | |||
| − | |[[Invulnerability|Invulnerabilities]]|| || || |
||
|- |
|- |
||
| − | |[[ |
+ | |[[Chainsaw]]s|| || || || |
|- |
|- |
||
| − | |[[ |
+ | |[[Shotgun]]s||1 || || || |
|- |
|- |
||
| − | |[[ |
+ | |[[Super shotgun]]s||1 || || || |
|- |
|- |
||
| − | |[[ |
+ | |[[Chaingun]]s||1 || || || |
|- |
|- |
||
| − | |[[ |
+ | |[[Rocket launcher]]s||1 || || || |
|- |
|- |
||
| − | |[[ |
+ | |[[Plasma rifle]]s|| || || || |
|- |
|- |
||
| ⚫ | |||
| ⚫ | |||
|- |
|- |
||
| ⚫ | |||
| ⚫ | |||
|- |
|- |
||
| − | |[[ |
+ | |[[Ammo clip]]s|| || || || |
|- |
|- |
||
| − | |[[ |
+ | |[[Box of ammo|Bullet boxes]]||2 || || || |
|- |
|- |
||
| − | |[[ |
+ | |[[Shell]]s|| || || || |
|- |
|- |
||
| − | |[[ |
+ | |[[Box of shells|Shell boxes]]||13 || || || |
|- |
|- |
||
| − | |[[ |
+ | |[[Rocket]]s|| || || || |
|- |
|- |
||
| − | |[[ |
+ | |[[Box of rockets|Rocket boxes]]||46 || || || |
|- |
|- |
||
| ⚫ | |||
| ⚫ | |||
|- |
|- |
||
| − | |[[ |
+ | |[[Bulk cell]]s||69 || || || |
|- |
|- |
||
| ⚫ | |||
| − | |[[Box of ammo|Bullet boxes]]|| || || |
||
|- |
|- |
||
| − | |[[ |
+ | |[[Blue skull key|Blue skulls]]||1 ||1 ||1 ||1 |
|- |
|- |
||
| − | |[[ |
+ | |[[Red skull key|Red skulls]]||2 ||2 ||2 ||2 |
| − | |- |
||
| − | |[[Rocket]]s|| || || |
||
| − | |- |
||
| − | |[[Box of rockets|Rocket boxes]]|| || || |
||
| − | |- |
||
| − | |[[Energy cell]]s|| || || |
||
| − | |- |
||
| − | |[[Bulk cell]]s|| || || |
||
| − | |- |
||
| ⚫ | |||
| − | |- |
||
| − | |[[Blue keycard|Blue cards]]|| || || |
||
| − | |- |
||
| ⚫ | |||
| − | |- |
||
| − | |[[Red keycard|Red cards]]|| || || |
||
| − | |- |
||
| − | |[[Red skull key|Red skulls]]|| || || |
||
| − | |- |
||
| − | |[[Yellow keycard|Yellow cards]]|| || || |
||
| − | |- |
||
| − | |[[Yellow skull key|Yellow skulls]]|| || || |
||
|- |
|- |
||
| ⚫ | |||
|} |
|} |
||
| ⚫ | |||
| − | ==Trivia== |
||
| − | |||
| − | |||
| − | ==See also== |
||
| − | |||
| − | * |
||
| − | ==External links== |
||
[[Category:Levels by name|Gaia's Temple (Scythe 2)]] |
[[Category:Levels by name|Gaia's Temple (Scythe 2)]] |
||
Latest revision as of 04:37, 23 March 2020
- This level occupies the map slot MAP24. For other maps which occupy this slot, see Category:MAP24.
MAP24: Gaia's Temple is the twenty-fourth map of the megawad Scythe 2. It was designed by Erik Alm and uses the music track "Dungeon (No 21)" from Daggerfall".
[[file: |thumb|300px|Map of **]]
Walkthrough
MAP24, lava
Secrets
- Once you make it to the Switch that lowers the Red Skull Key in the wall and outside in the middle, go to the window area where you can drop back down to the start zone. You shoud try to land on the ledge where the green torch is. Now stay close to the wall and move to the starting zone and try to run over to the tower platform in the middle, then carefully navigate your way to the other side and try to run onto the next ledge. Once you're on the ledge, follow it to the green torch: Behind it you will see a hole in the wall (SECONDARY Option: get an Arch-Vile to assist you; note that this secret is hard to get and might not be worth the effort) (Reward: Invulnerability Sphere)
Speedrunning
MAP24, ensemble
Records
The Compet-N records for the map are:
| Run | Time | Player | Date | File | Notes |
|---|---|---|---|---|---|
| UV speed | [1] | ||||
| NM speed | |||||
| UV max | |||||
| NM100S | |||||
| UV -fast | |||||
| UV -respawn | |||||
| UV Tyson | |||||
| UV pacifist |
Statistics
Map data
MAP24, end
| Things | 549 |
| Vertices | 11249 |
| Linedefs | 11322 |
| Sidedefs | 19409 |
| Sectors | 2022 |
Things
| Monsters | ITYTD and HNTR | HMP | UV and NM | MP on UV |
|---|---|---|---|---|
| Arachnotrons | 3 | 3 | 3 | 3 |
| Arch-Viles | 14 | 15 | 28 | 28 |
| Barons of Hell | 32 | 34 | 34 | 34 |
| Cacodemons | 4 | 4 | 4 | 4 |
| Chaingunners | 96 | 96 | 96 | 96 |
| Cyberdemons | 5 | 6 | 7 | 7 |
| Demons | 1 | 1 | 1 | 1 |
| Hell Knights | 63 | 63 | 63 | 63 |
| Imps | 115 | 115 | 115 | 115 |
| Mancubi | 24 | 24 | 24 | 24 |
| Pain Elementals | 2 | 2 | 2 | 2 |
| Revenants | 268 | 268 | 268 | 268 |
| Wolfenstein SS | 7 | 7 | 6 | 6 |
| Powerups | ITYTD and HNTR | HMP | UV and NM | MP on UV |
| Armor bonuses | ||||
| Backpacks | 3 | |||
| Berserk packs | ||||
| Blue armors | 4 | |||
| Computer maps | ||||
| Green armors | 3 | |||
| Health bonuses | ||||
| Invisibilities | 1 | |||
| Invulnerabilities | 6 | |||
| Light goggles | ||||
| Medikits | 23 | |||
| Megaspheres | 12 | |||
| Radiation suits | ||||
| Soul Spheres | 7 | |||
| Stimpacks | ||||
| Weapons | ITYTD and HNTR | HMP | UV and NM | MP on UV |
| Chainsaws | ||||
| Shotguns | 1 | |||
| Super shotguns | 1 | |||
| Chainguns | 1 | |||
| Rocket launchers | 1 | |||
| Plasma rifles | ||||
| BFG 9000s | 1 | |||
| Ammunition | ITYTD and HNTR | HMP | UV and NM | MP on UV |
| Ammo clips | ||||
| Bullet boxes | 2 | |||
| Shells | ||||
| Shell boxes | 13 | |||
| Rockets | ||||
| Rocket boxes | 46 | |||
| Energy cells | ||||
| Bulk cells | 69 | |||
| Keys | ITYTD and HNTR | HMP | UV and NM | MP on UV |
| Blue skulls | 1 | 1 | 1 | 1 |
| Red skulls | 2 | 2 | 2 | 2 |
| Yellow skulls | 2 | 2 | 2 | 2 |