Map of Factory: Manufacturing
Template:Strife 21-31
- This level occupies the map slot MAP21. For other maps which occupy this slot, see Category:MAP21.
Factory: Manufacturing is the main shop floor of the Factory.
Walkthrough to the good ending
Mission G11: Onward to the Lab
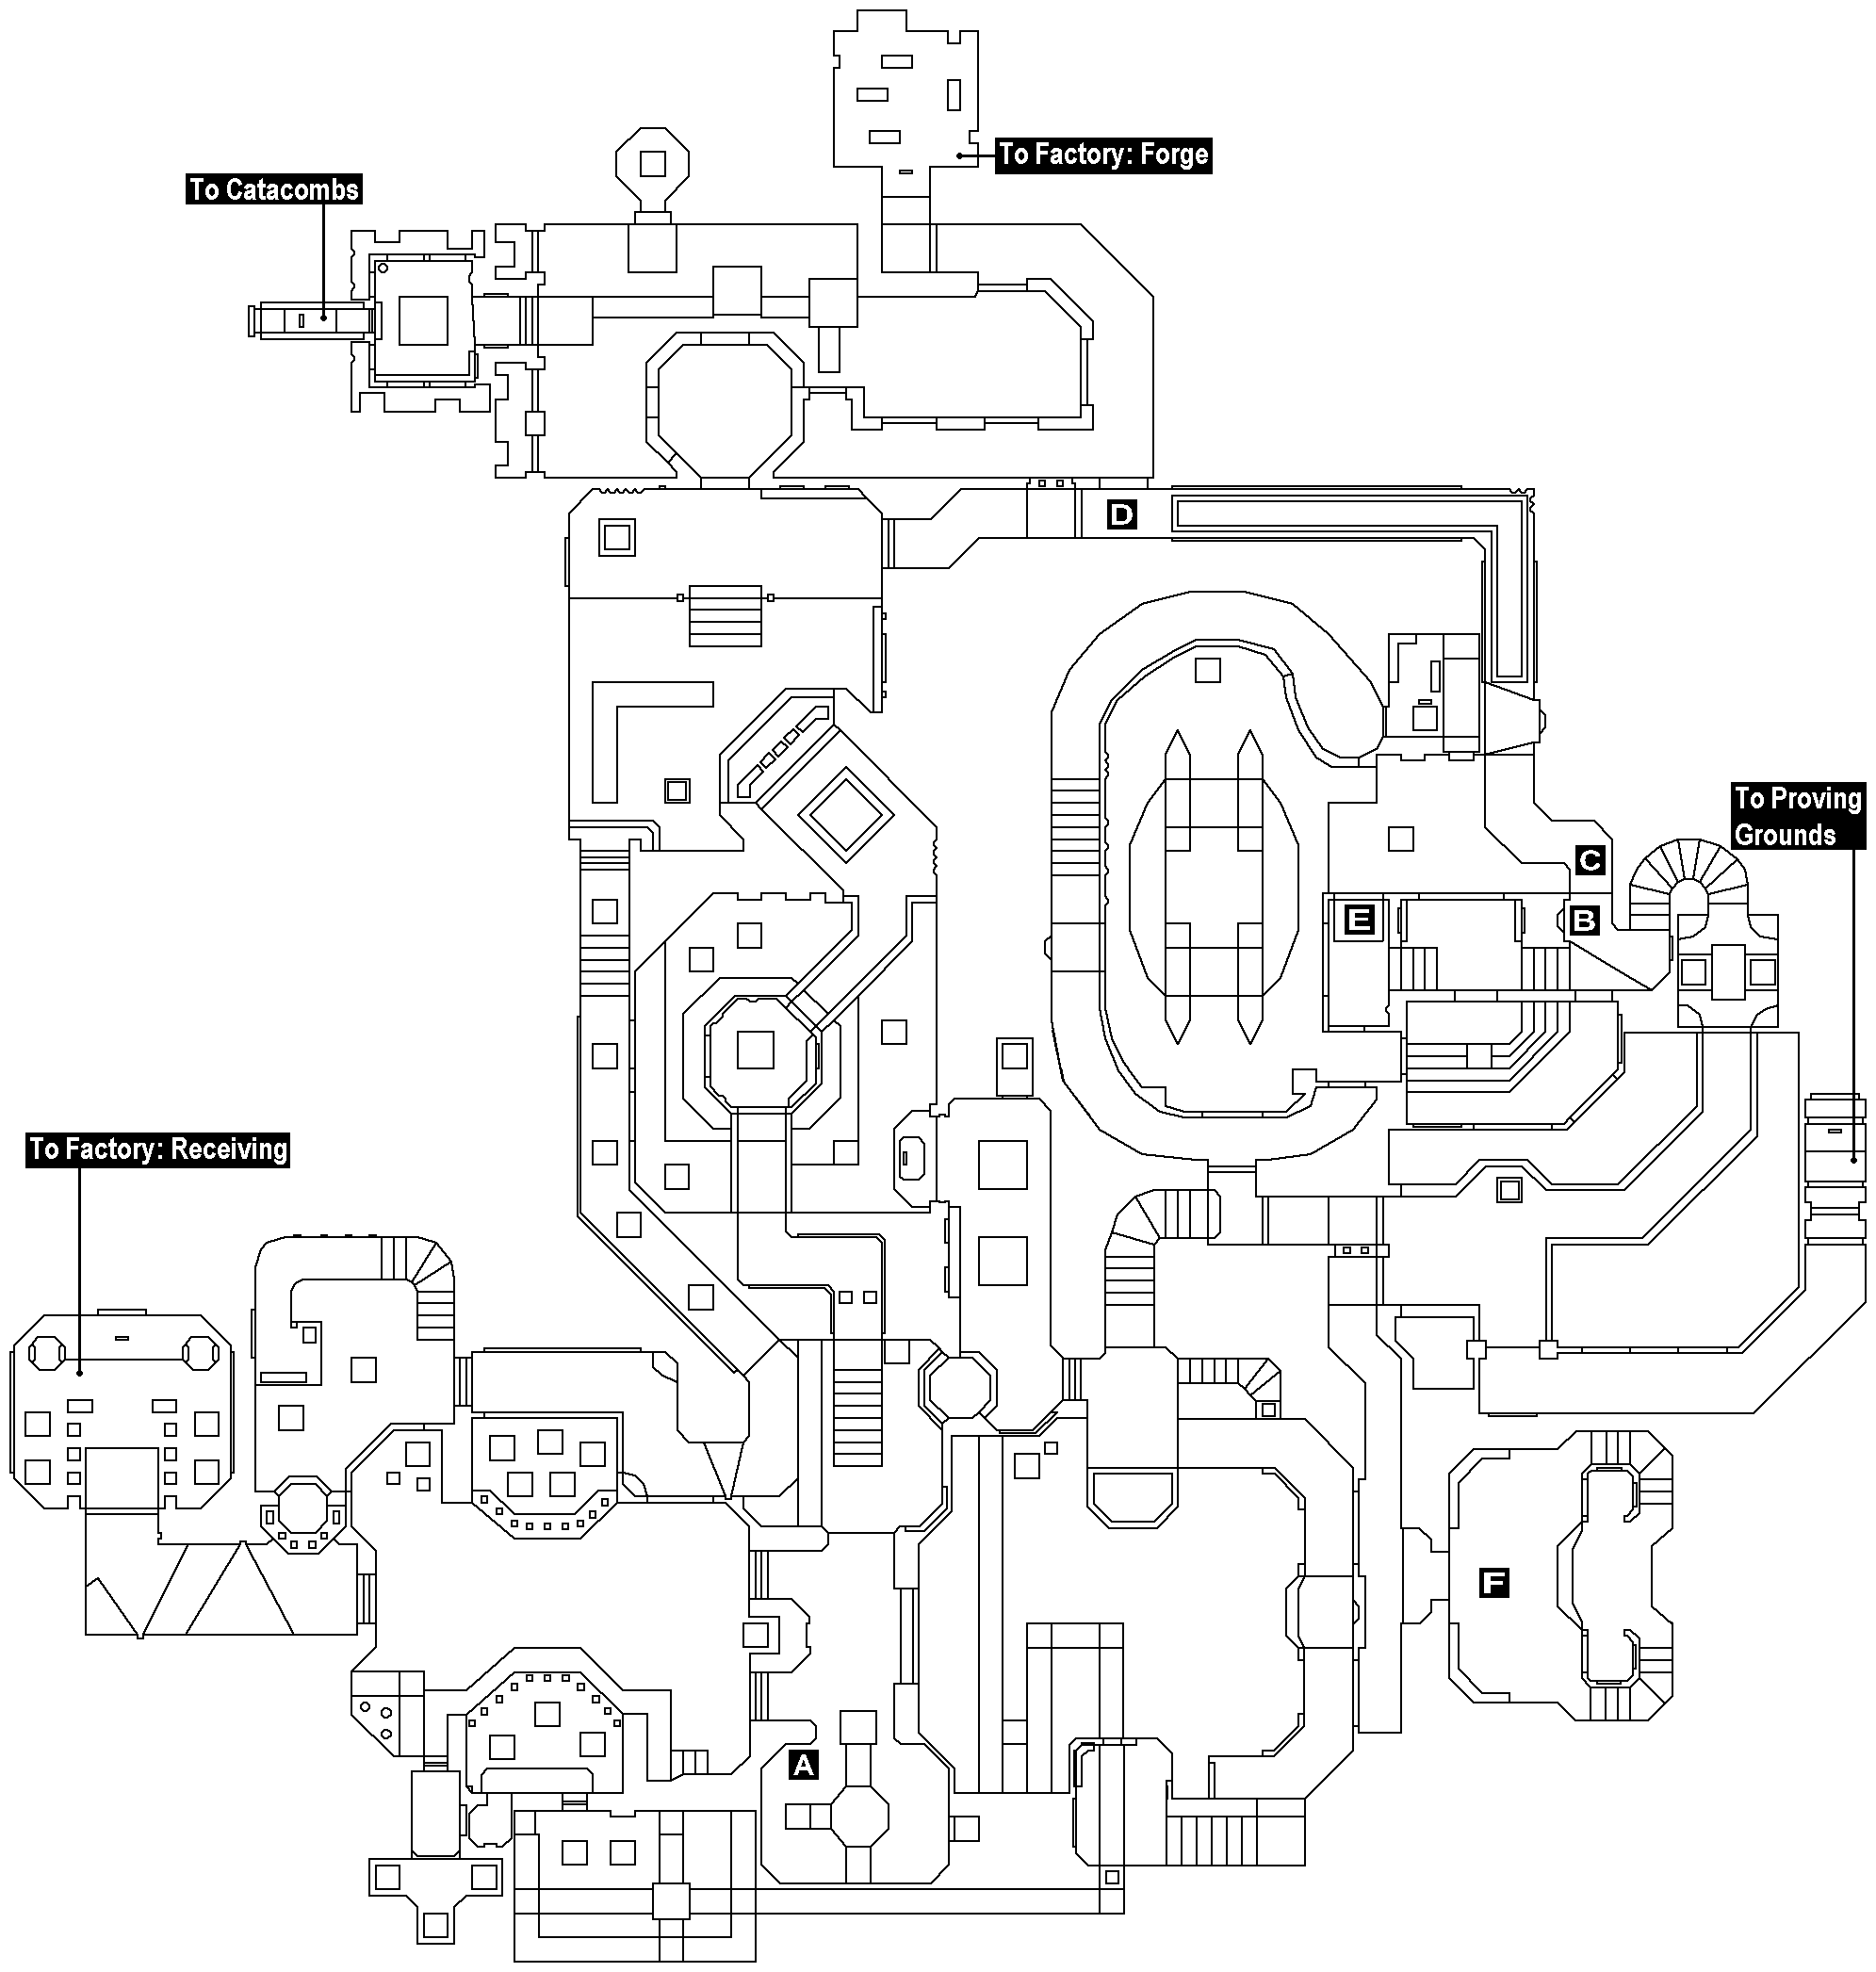
Go around and through the door. You can if you like go up the short flight of steps at the other end, where behind a door at the end of that narrow ledge is a Targeter; but you don't need to turn the valve inside there, as all it does is to lower the water level behind the bars, revealing a hidden door leading to a passage to a switch which opens the door at the back of the valve/targeter room and thereby reveals three teleporters... which sounds promising, except that you can't get through those bars to reach the door, and by the time you find another route to this door, it will be so late in the level that those teleporters won't be likely to be any use.
Have a powerful weapon ready and go through either of the two doors opposite the one you came in, then through the big door opposite those and take down the Inquisitor awaiting you on the other side. Across the room to the lift, turn right at the top and kill the Acolytes (and the Reaver on the three hard difficulties), then get out a powerful long-range weapon, flip the switch, and destroy the enemy/enemies thus revealed (two Crusaders or a Templar depending on difficulty). Go around to where they were, up the staircase to your left, and down the next staircase to your left. Go through the doorway in front of you and down the lift, and to your right and around is the passage to the Proving Grounds. However, if looking for the Red Talisman, you will first need to get the Blue Chalice from room (F) (see below), take it all the way back to Timothy in the Order Commons, then come back here and go to the Forge (see below again) before continuing to the Proving Grounds.
Alternatively, if you need more supplies, you could optionally:
- Go straight ahead after going down that lift. Up and around the stairway, press the switch to your right (B) and immediately drop onto, and go around, the walkway (C) before it has fully risen. (It doesn't stay up for long, so while there are still enemies on it you need a head start.) Quickly kill the Acolytes, then hurry off the walkway at the other end (if the walkway drops with you still on it, turn left and run to the lift (E); be quick, as the water down here is poisonous), and continue along the corridor to a lift (D). Instead of riding this, turn right and go around to the Forge. (Although it is possible to leap to and across the blocks in the water, there is no need as they lead only to the Catacombs.)
- Turn around and go up the other lift. This leads to a room (F) with plenty of supplies including a map and a scanner.
Secrets
Official
- After going through one of the two doors which both lead to the same big door, turn right and head to the end of the passage then turn around. Press the switch (A) to open a nearby small closet containing Shadow Armor and a Surgery Kit. (In the Veteran Edition, this is no longer an official secret, hence doesn't count towards the Completionist achievement.)
Non-official
- Optional route #2 above.