(→Things) |
m (→Records: clean up) |
||
| (18 intermediate revisions by 5 users not shown) | |||
| Line 1: | Line 1: | ||
| + | {{stub|article}} |
||
{{map|slot=MAP08}} |
{{map|slot=MAP08}} |
||
| ⚫ | |||
| − | '''MAP08: Graverobbers''' is the eighth map of the [[megawad]] [[Scythe 2]]. It was designed by [[Erik Alm]] and uses the [[ |
+ | '''MAP08: Graverobbers''' is the eighth map of the [[megawad]] [[Scythe 2]]. It was designed by [[Erik Alm]] and uses the [[music]] track "Great Pyramid " from Illusion of Gaia. |
| + | [[file: |thumb|300px|Map of **]] <br clear="left"/> |
||
| − | ==Strategy== |
||
| ⚫ | |||
| − | |||
| − | [[ |
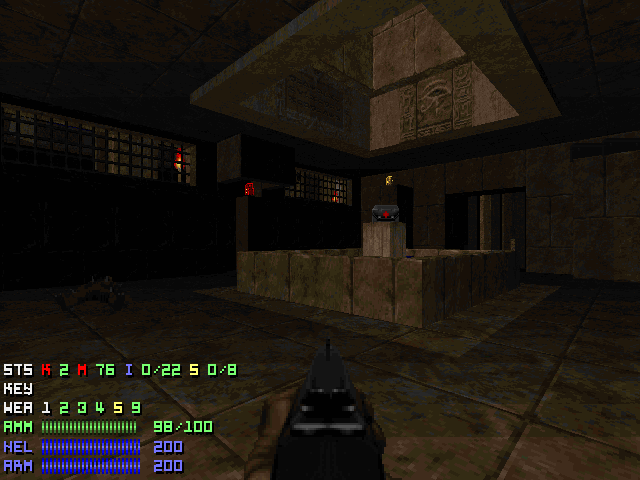
+ | [[file:Scythe2-map08-start.png|thumb|300px|MAP08, start]] |
| − | |||
| − | |||
| ⚫ | |||
| − | [[Image:Scythe2-map08-start.png|thumb|300px|MAP08, start]] |
||
===Secrets=== |
===Secrets=== |
||
| − | # As you fight your way from the start to the outside |
+ | # As you fight your way from the start to the outside area there will be a set of stairs leading up a structure that resembles a step pyramid and ending in a temple-like building. On the second step/terrace: Head left; at the end you will find a wall stone tablet/placque, hit it with your Use/Open key (default space) then head over to the opposite side (i.e. the right side) and you will see that a section of the wall will have opened, revealing a small secret room with a monster in it (Reward: Bulk cell). |
| − | #Now head up the stairs into the |
+ | #Now head up the stairs into the temple. Once you're inside, you will see a small window to your right, through which a room with water in it can be seen, which has a switch on the opposite wall. Shoot it and a door will open to your left giving you access to said room (Reward: Blue armor and a Health Bonus). |
| − | #Continue the map until you reach a big room in |
+ | #Continue the map until you reach a big room in the temple where a Super Shotgun is located. Once you pick it up some walls will lower revealing an ambush. Once you have dealt with the enemies, check the small niches that have just opened. The middle one has a bloody wall texture which is actually a switch. Use your Use/Open key (default Space) on it and a wall should open nearby in the same room (Reward: N/A). |
| − | # |
+ | #Continuing where 3. left off as you go trough the small hallway you will end up at the start of the map but to your right side a wall will have opened, revealing a switch (Reward: Four boxes of rockets). |
| − | # |
+ | #Continuing from where (3. 4.) left off, backtrack to where you found the Super Shotgun and got ambushed and head over to the big room. Turn right where the red torches and small barred windows that show the start area are. You will see that a broken wall in the middle has opened up (Reward: Red Keycard). |
| − | # |
+ | #Continuing from where (3. to 5.) left off, head back to the big staircase that leads to the temple but don't go up the stairs. Keep going forward instead, until you see a big tower-like structure with red torches and a lot of small Candles surrounding it. To the right side of the tower the red door can be found (Reward: Bulk Cell and a Soul Sphere). |
| − | # |
+ | #Continuing from (3. to 6.), standing in the red door room, facing the its back wall, a section of the left wall (right behind the second candle, counting from the entrance) can be opened to reveal another secret (Reward: BFG 9000) |
| − | #Continue playing the map until you reach the |
+ | #Continue playing the map until you reach the room containing the switch that lowers the yellow keycard, which is located near the start. Once you activate the switch and head over to the window-like openings from which you can drop down to the starting zone, don't just drop. Run and jump through the right window instead and try to land on the fountain in the middle of the starting zone (Reward: Berserk pack) |
==Speedrunning== |
==Speedrunning== |
||
===Routes and tricks=== |
===Routes and tricks=== |
||
| − | [[ |
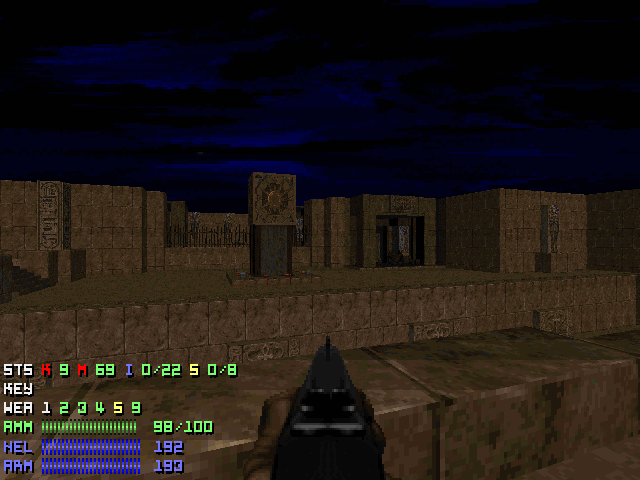
+ | [[file:Scythe2-map08-ensemble.png|thumb|300px|MAP08, ensemble]] |
===Records=== |
===Records=== |
||
| Line 32: | Line 28: | ||
The [[Compet-N]] records for the map are: |
The [[Compet-N]] records for the map are: |
||
| + | {| class="WikiaTable" |
||
| − | {| {{prettytable}} |
||
!Run||Time||Player||Date||File||Notes |
!Run||Time||Player||Date||File||Notes |
||
|- |
|- |
||
| − | |[[UV speed]]|| || || ||{{competnftp|**|**}}|| |
+ | |[[UV speed]]|| || || ||{{External Link|site=competnftp|file_path=**|**}}|| |
|- |
|- |
||
|[[NM speed]]|| || || || || |
|[[NM speed]]|| || || || || |
||
| Line 56: | Line 52: | ||
===Map data=== |
===Map data=== |
||
| + | {| class="WikiaTable" |
||
| − | {| {{prettytable}} |
||
| − | |[[Things]]|| |
+ | |[[Things]]||227 |
|- |
|- |
||
| − | |[[Vertices]]|| |
+ | |[[Vertices]]||3109 |
|- |
|- |
||
| − | |[[Linedefs]]|| |
+ | |[[Linedefs]]||3059 |
|- |
|- |
||
| − | |[[Sidedefs]]|| |
+ | |[[Sidedefs]]||4776 |
|- |
|- |
||
| − | |[[Sectors]]|| |
+ | |[[Sectors]]||538 |
|} |
|} |
||
===Things=== |
===Things=== |
||
| + | {| class="WikiaTable" |
||
| − | {| {{prettytable}} |
||
!Monsters||[[I'm Too Young To Die|ITYTD]] and [[Hey, Not Too Rough|HNTR]]||[[Hurt Me Plenty|HMP]]||[[Ultra-Violence|UV]] and [[Nightmare!|NM]]||[[Multiplayer|MP]] on [[Ultra-Violence|UV]] |
!Monsters||[[I'm Too Young To Die|ITYTD]] and [[Hey, Not Too Rough|HNTR]]||[[Hurt Me Plenty|HMP]]||[[Ultra-Violence|UV]] and [[Nightmare!|NM]]||[[Multiplayer|MP]] on [[Ultra-Violence|UV]] |
||
|- |
|- |
||
| − | |[[Arch-Vile]]s|| || || ||8 |
+ | |[[Arch-Vile]]s||1 ||1 ||5 ||8 |
|- |
|- |
||
| − | |[[ |
+ | |[[Arachnotron]]s||1 ||1 ||0 ||0 |
|- |
|- |
||
| − | |[[ |
+ | |[[Baron of Hell|Barons of Hell]]||0 ||1 ||2 ||2 |
|- |
|- |
||
| − | |[[ |
+ | |[[Cacodemon]]s||0 ||0 ||4 ||4 |
|- |
|- |
||
| − | |[[ |
+ | |[[Chaingunner]]s||1 ||3 ||14 ||14 |
|- |
|- |
||
| − | |[[ |
+ | |[[Cyberdemon]]s||0 ||0 ||1 ||2 |
|- |
|- |
||
| − | |[[ |
+ | |[[Demon]]s||6 ||10 ||10 ||10 |
|- |
|- |
||
| − | |[[ |
+ | |[[Hell Knight]]s||3 ||6 ||8 ||8 |
|- |
|- |
||
| − | |[[ |
+ | |[[Imp]]s||48 ||71 ||79 ||79 |
|- |
|- |
||
| − | |[[ |
+ | |[[Mancubus|Mancubi]]||4 ||4 ||10 ||13 |
|- |
|- |
||
| − | |[[ |
+ | |[[Revenant]]s||3 ||7 ||9 ||24 |
|- |
|- |
||
| − | |[[ |
+ | |[[Sergeant]]s||10 ||17 ||18 ||18 |
| ⚫ | |||
| + | |[[Spider Mastermind]]s||1 ||1 ||1 ||1 |
||
|- |
|- |
||
!Powerups||ITYTD and HNTR||HMP||UV and NM||MP on UV |
!Powerups||ITYTD and HNTR||HMP||UV and NM||MP on UV |
||
|- |
|- |
||
| − | |[[Backpack]]s|| || || ||1 |
+ | |[[Backpack]]s||1 ||1 ||1 ||1 |
|- |
|- |
||
| − | |[[Berserk pack]]s|| || || ||1 |
+ | |[[Berserk pack]]s||1 ||1 ||1 ||1 |
|- |
|- |
||
| − | |[[ |
+ | |[[Health potion|Health bonuses]]||1 ||1 ||1 ||1 |
|- |
|- |
||
| − | |[[ |
+ | |[[Blue armor]]s||2 ||2 ||2 ||2 |
|- |
|- |
||
| − | |[[ |
+ | |[[Green armor]]s||2 ||2 ||2 ||2 |
|- |
|- |
||
| − | |[[ |
+ | |[[Medikit]]s||10 ||10 ||10 ||18 |
|- |
|- |
||
| − | |[[ |
+ | |[[Soul Sphere]]s||0 ||0 ||1 ||2 |
| + | |- |
||
| + | |[[Stimpack]]s||14 ||14 ||14 ||14 |
||
|- |
|- |
||
!Weapons||ITYTD and HNTR||HMP||UV and NM||MP on UV |
!Weapons||ITYTD and HNTR||HMP||UV and NM||MP on UV |
||
|- |
|- |
||
| − | |[[Shotgun]]s|| || || ||2 |
+ | |[[Shotgun]]s||2 ||2 ||2 ||2 |
|- |
|- |
||
| − | |[[Super shotgun]]s|| || || ||1 |
+ | |[[Super shotgun]]s||1 ||1 ||1 ||1 |
|- |
|- |
||
| − | |[[Chaingun]]s|| || || ||1 |
+ | |[[Chaingun]]s||1 ||1 ||1 ||1 |
|- |
|- |
||
| − | |[[Rocket launcher]]s|| || || ||2 |
+ | |[[Rocket launcher]]s||1 ||1 ||1 ||2 |
|- |
|- |
||
| − | |[[Plasma rifle]]s|| || || ||1 |
+ | |[[Plasma rifle]]s||1 ||1 ||1 ||1 |
|- |
|- |
||
| − | |[[BFG 9000]]s|| || || ||1 |
+ | |[[BFG 9000]]s||1 ||1 ||1 ||1 |
|- |
|- |
||
!Ammunition||ITYTD and HNTR||HMP||UV and NM||MP on UV |
!Ammunition||ITYTD and HNTR||HMP||UV and NM||MP on UV |
||
|- |
|- |
||
| − | |[[Ammo clip]]s|| || || ||2 |
+ | |[[Ammo clip]]s||2 ||2 ||2 ||2 |
|- |
|- |
||
| − | |[[Box of ammo|Bullet boxes]]|| || || || |
+ | |[[Box of ammo|Bullet boxes]]||8 ||8 ||8 ||8 |
|- |
|- |
||
| − | |[[Shell]]s|| || || ||25 |
+ | |[[Shell]]s||25 ||25 ||25 ||25 |
|- |
|- |
||
| − | |[[Box of shells|Shell boxes]]|| || || ||6 |
+ | |[[Box of shells|Shell boxes]]||5 ||5 ||5 ||6 |
|- |
|- |
||
| − | |[[Rocket]]s|| || || ||16 |
+ | |[[Rocket]]s||16 ||16 ||16 ||16 |
|- |
|- |
||
| − | |[[Box of rockets|Rocket boxes]]|| || || ||18 |
+ | |[[Box of rockets|Rocket boxes]]||9 ||9 ||9 ||18 |
|- |
|- |
||
| − | |[[Bulk cell]]s|| || || ||4 |
+ | |[[Bulk cell]]s||2 ||2 ||4 ||4 |
|- |
|- |
||
!Keys||ITYTD and HNTR||HMP||UV and NM||MP on UV |
!Keys||ITYTD and HNTR||HMP||UV and NM||MP on UV |
||
| Line 148: | Line 148: | ||
|- |
|- |
||
|[[Yellow keycard|Yellow cards]]||1 ||1 ||1 ||1 |
|[[Yellow keycard|Yellow cards]]||1 ||1 ||1 ||1 |
||
| ⚫ | |||
|} |
|} |
||
| ⚫ | |||
| − | ==Trivia== |
||
| − | |||
| − | |||
| − | ==See also== |
||
| − | |||
| − | * |
||
| − | |||
| − | ==External links== |
||
[[Category:Levels by name|Graverobbers (Scythe 2)]] |
[[Category:Levels by name|Graverobbers (Scythe 2)]] |
||
Revision as of 04:36, 23 March 2020

This article is a stub. Please help the Doom Wiki by expanding it.
- This level occupies the map slot MAP08. For other maps which occupy this slot, see Category:MAP08.
MAP08: Graverobbers is the eighth map of the megawad Scythe 2. It was designed by Erik Alm and uses the music track "Great Pyramid " from Illusion of Gaia.
[[file: |thumb|300px|Map of **]]
Walkthrough
MAP08, start
Secrets
- As you fight your way from the start to the outside area there will be a set of stairs leading up a structure that resembles a step pyramid and ending in a temple-like building. On the second step/terrace: Head left; at the end you will find a wall stone tablet/placque, hit it with your Use/Open key (default space) then head over to the opposite side (i.e. the right side) and you will see that a section of the wall will have opened, revealing a small secret room with a monster in it (Reward: Bulk cell).
- Now head up the stairs into the temple. Once you're inside, you will see a small window to your right, through which a room with water in it can be seen, which has a switch on the opposite wall. Shoot it and a door will open to your left giving you access to said room (Reward: Blue armor and a Health Bonus).
- Continue the map until you reach a big room in the temple where a Super Shotgun is located. Once you pick it up some walls will lower revealing an ambush. Once you have dealt with the enemies, check the small niches that have just opened. The middle one has a bloody wall texture which is actually a switch. Use your Use/Open key (default Space) on it and a wall should open nearby in the same room (Reward: N/A).
- Continuing where 3. left off as you go trough the small hallway you will end up at the start of the map but to your right side a wall will have opened, revealing a switch (Reward: Four boxes of rockets).
- Continuing from where (3. 4.) left off, backtrack to where you found the Super Shotgun and got ambushed and head over to the big room. Turn right where the red torches and small barred windows that show the start area are. You will see that a broken wall in the middle has opened up (Reward: Red Keycard).
- Continuing from where (3. to 5.) left off, head back to the big staircase that leads to the temple but don't go up the stairs. Keep going forward instead, until you see a big tower-like structure with red torches and a lot of small Candles surrounding it. To the right side of the tower the red door can be found (Reward: Bulk Cell and a Soul Sphere).
- Continuing from (3. to 6.), standing in the red door room, facing the its back wall, a section of the left wall (right behind the second candle, counting from the entrance) can be opened to reveal another secret (Reward: BFG 9000)
- Continue playing the map until you reach the room containing the switch that lowers the yellow keycard, which is located near the start. Once you activate the switch and head over to the window-like openings from which you can drop down to the starting zone, don't just drop. Run and jump through the right window instead and try to land on the fountain in the middle of the starting zone (Reward: Berserk pack)
Speedrunning
Routes and tricks
MAP08, ensemble
Records
The Compet-N records for the map are:
| Run | Time | Player | Date | File | Notes |
|---|---|---|---|---|---|
| UV speed | [1] | ||||
| NM speed | |||||
| UV max | |||||
| NM100S | |||||
| UV -fast | |||||
| UV -respawn | |||||
| UV Tyson | |||||
| UV pacifist |
Statistics
Map data
| Things | 227 |
| Vertices | 3109 |
| Linedefs | 3059 |
| Sidedefs | 4776 |
| Sectors | 538 |
Things
| Monsters | ITYTD and HNTR | HMP | UV and NM | MP on UV |
|---|---|---|---|---|
| Arch-Viles | 1 | 1 | 5 | 8 |
| Arachnotrons | 1 | 1 | 0 | 0 |
| Barons of Hell | 0 | 1 | 2 | 2 |
| Cacodemons | 0 | 0 | 4 | 4 |
| Chaingunners | 1 | 3 | 14 | 14 |
| Cyberdemons | 0 | 0 | 1 | 2 |
| Demons | 6 | 10 | 10 | 10 |
| Hell Knights | 3 | 6 | 8 | 8 |
| Imps | 48 | 71 | 79 | 79 |
| Mancubi | 4 | 4 | 10 | 13 |
| Revenants | 3 | 7 | 9 | 24 |
| Sergeants | 10 | 17 | 18 | 18 |
| Spider Masterminds | 1 | 1 | 1 | 1 |
| Powerups | ITYTD and HNTR | HMP | UV and NM | MP on UV |
| Backpacks | 1 | 1 | 1 | 1 |
| Berserk packs | 1 | 1 | 1 | 1 |
| Health bonuses | 1 | 1 | 1 | 1 |
| Blue armors | 2 | 2 | 2 | 2 |
| Green armors | 2 | 2 | 2 | 2 |
| Medikits | 10 | 10 | 10 | 18 |
| Soul Spheres | 0 | 0 | 1 | 2 |
| Stimpacks | 14 | 14 | 14 | 14 |
| Weapons | ITYTD and HNTR | HMP | UV and NM | MP on UV |
| Shotguns | 2 | 2 | 2 | 2 |
| Super shotguns | 1 | 1 | 1 | 1 |
| Chainguns | 1 | 1 | 1 | 1 |
| Rocket launchers | 1 | 1 | 1 | 2 |
| Plasma rifles | 1 | 1 | 1 | 1 |
| BFG 9000s | 1 | 1 | 1 | 1 |
| Ammunition | ITYTD and HNTR | HMP | UV and NM | MP on UV |
| Ammo clips | 2 | 2 | 2 | 2 |
| Bullet boxes | 8 | 8 | 8 | 8 |
| Shells | 25 | 25 | 25 | 25 |
| Shell boxes | 5 | 5 | 5 | 6 |
| Rockets | 16 | 16 | 16 | 16 |
| Rocket boxes | 9 | 9 | 9 | 18 |
| Bulk cells | 2 | 2 | 4 | 4 |
| Keys | ITYTD and HNTR | HMP | UV and NM | MP on UV |
| Red cards | 1 | 1 | 1 | 1 |
| Yellow cards | 1 | 1 | 1 | 1 |