No edit summary |
m (clean up) |
||
| (20 intermediate revisions by 10 users not shown) | |||
| Line 1: | Line 1: | ||
| ⚫ | |||
{{map|slot=MAP01}} |
{{map|slot=MAP01}} |
||
| + | {{map|slot=MAP25}} |
||
| − | '''MAP01: Congo''' is the first map of [[Plutonia]]. |
+ | '''MAP01: Congo (MAP25 in [[Sony PlayStation|PSX]])''' is the first map of [[The Plutonia Experiment]]. It uses the music track "The Imp's Song" from [[Doom]]. |
| ⚫ | |||
| − | == Overview== |
||
| ⚫ | |||
| + | You begin in a room surrounded by sludge on top of some [[shells]]. In front of you is a long hallway, with a door to the left and right. Go through either door, up the stairs, and clean out the [[sergeant]]s at the top. Go to the room with the wall that has a demon face on it. The face is a switch. Hit it, grab the goods, and get out and go through the long hallway into a courtyard. |
||
| ⚫ | To the right of you is a hallway and another room leading off the courtyard. Go to the hallway, and at the end a door will open behind you, revealing some [[chaingunner]]s and a [[medikit]]. Go through the door, clear out the chaingunners, and find the box that looks slightly different from the others. This box is a lift. Ride it up, grab the [[super shotgun]], and kill the [[arch-vile]] that appears. Exit the room, go back through the hallway, and head right into the room leading off the courtyard. Follow it to the end, where you will see a pillar with a switch. Hit the switch, grab the medikit, and run back out, killing the [[revenant]]s that follow. Go back in and grab the [[rocket launcher]] and rockets that was in the rooms the revenants came out of, and go back to the courtyard. Go forward and up some stairs, keeping an eye out for baddies, and go through the door. you will be on a walkway that leads off to three different paths. Go forward, and kill the revenant that comes up. Go left, hit the switch in the room, and head back out. Go along the path the revenant came up on, and in the room is a chaingunner on your left and right, and a [[mancubus]] that will ride up a lift. Kill them, grab the red skull [[key]], head out, and kill the new baddies that should have just showed up. The hallway they came out of is a lift, and you can ride it up for some shells. Go back into the courtyard, and kill the arch-vile on top of the pillar. Go into the last hallway you haven't been to, and you will be in a room with a pillar in the middle, and [[imp]]s to the left and right on raised platforms. Proceed forward, and some chaingunners will appear behind you. Kill them, then go through the red door. Hit the switch, which lowers the pillar with the blue skull key on it. The switch also revealed two chaingunners, so use your fist to get them to come out. Mash them and grab the key, then exit. Go back up the stairs, and into the hallway that should be in front of you. Kill the chaingunners and mancubi you see, then go through the blue door. Follow the hallway, and come out onto the platform with the Mancubi, then step on the exit pad. |
||
| ⚫ | |||
| ⚫ | |||
| ⚫ | |||
===Secrets=== |
===Secrets=== |
||
| + | ====Official==== |
||
# At the east end of the map is a plus-shaped bridge crossing a pit of brown sludge. Walking along the eastern arm of this bridge causes a wall to open in an alcove in the southwest corner of this room. Drop into the sludge beneath the alcove and lower it like a lift to access the box of shells. |
# At the east end of the map is a plus-shaped bridge crossing a pit of brown sludge. Walking along the eastern arm of this bridge causes a wall to open in an alcove in the southwest corner of this room. Drop into the sludge beneath the alcove and lower it like a lift to access the box of shells. |
||
| + | ====Non-official==== |
||
| − | == Areas / screenshots == |
||
| + | # At the starting point of the level, take either side doors and ascend to the rooms on the upper floor. The west wall of the western room contains a gargoyle switch. Hit it to access a small cross-shaped cache containing a [[backpack]] (the first one of the entire episode), a [[megaarmor]] and a [[box of shotgun shells]]. |
||
| + | ===Bugs=== |
||
| + | # In the room full of crates to the south east of the starting area is an [[Arch-vile]] on a lift, which is lowered by two linedefs in the room. It is possible to become stuck on the platform if you get on it after the Arch-vile leaves, but before it raises, as there is no way to lower it from inside. |
||
| + | # There are no items in the map, making it show 0% items were found, some ports ignore this completely. |
||
| + | |||
| + | ===Screenshots=== |
||
<gallery> |
<gallery> |
||
| − | Image:Plutonia-map01-start.png| |
+ | Image:Plutonia-map01-start.png|Starting room. |
| − | Image:Revenant-Plutonia-map01.png|[[Revenant]] |
+ | Image:Revenant-Plutonia-map01.png|[[Revenant]]s. |
| − | Image:Plutonia-map01.png| |
+ | Image:Plutonia-map01-bluekey.png|Grab the [[key|blue skull key]]. |
| − | Image:Plutonia-map01 |
+ | Image:Plutonia-map01.png|The exit teleporter. |
</gallery> |
</gallery> |
||
==Speedrunning== |
==Speedrunning== |
||
| − | |||
===Routes and tricks=== |
===Routes and tricks=== |
||
| + | |||
| + | It is possible to bypass any keys by simply straferunning from the ledge with the blue door to your exit. This may take a few tries however. |
||
===Records=== |
===Records=== |
||
The [[Compet-N]] records for the map are: |
The [[Compet-N]] records for the map are: |
||
| + | {| class="WikiaTable" |
||
| − | {| {{prettytable}} |
||
!Run||Time||Player||Date||File||Notes |
!Run||Time||Player||Date||File||Notes |
||
|- |
|- |
||
| Line 48: | Line 56: | ||
==Statistics== |
==Statistics== |
||
| − | |||
===Map data=== |
===Map data=== |
||
| + | {| class="WikiaTable" |
||
| − | {| {{prettytable}} |
||
|[[Things]]||165 |
|[[Things]]||165 |
||
|- |
|- |
||
| Line 63: | Line 70: | ||
===Things=== |
===Things=== |
||
| + | {| class="WikiaTable" |
||
| − | {| {{prettytable}} |
||
!Monsters||[[I'm Too Young To Die|ITYTD]] and [[Hey, Not Too Rough|HNTR]]||[[Hurt Me Plenty|HMP]]||[[Ultra-Violence|UV]] and [[Nightmare!|NM]] |
!Monsters||[[I'm Too Young To Die|ITYTD]] and [[Hey, Not Too Rough|HNTR]]||[[Hurt Me Plenty|HMP]]||[[Ultra-Violence|UV]] and [[Nightmare!|NM]] |
||
|- |
|- |
||
| Line 117: | Line 124: | ||
|- |
|- |
||
|[[Blue skull]]s||1||1||1 |
|[[Blue skull]]s||1||1||1 |
||
| − | |- |
||
|} |
|} |
||
==External links== |
==External links== |
||
* [http://www.doom2.net/~compet-n/database/cn.cgi?map:plut:01 MAP01 demos from the Compet-N database] |
* [http://www.doom2.net/~compet-n/database/cn.cgi?map:plut:01 MAP01 demos from the Compet-N database] |
||
| + | |||
| ⚫ | |||
| + | |||
| + | [[es:MAP01: Congo (FD-P)]] |
||
[[Category:Levels by name|Congo (The Plutonia Experiment)]] |
[[Category:Levels by name|Congo (The Plutonia Experiment)]] |
||
Revision as of 06:23, 14 December 2019
- This level occupies the map slot MAP01. For other maps which occupy this slot, see Category:MAP01.
- This level occupies the map slot MAP25. For other maps which occupy this slot, see Category:MAP25.
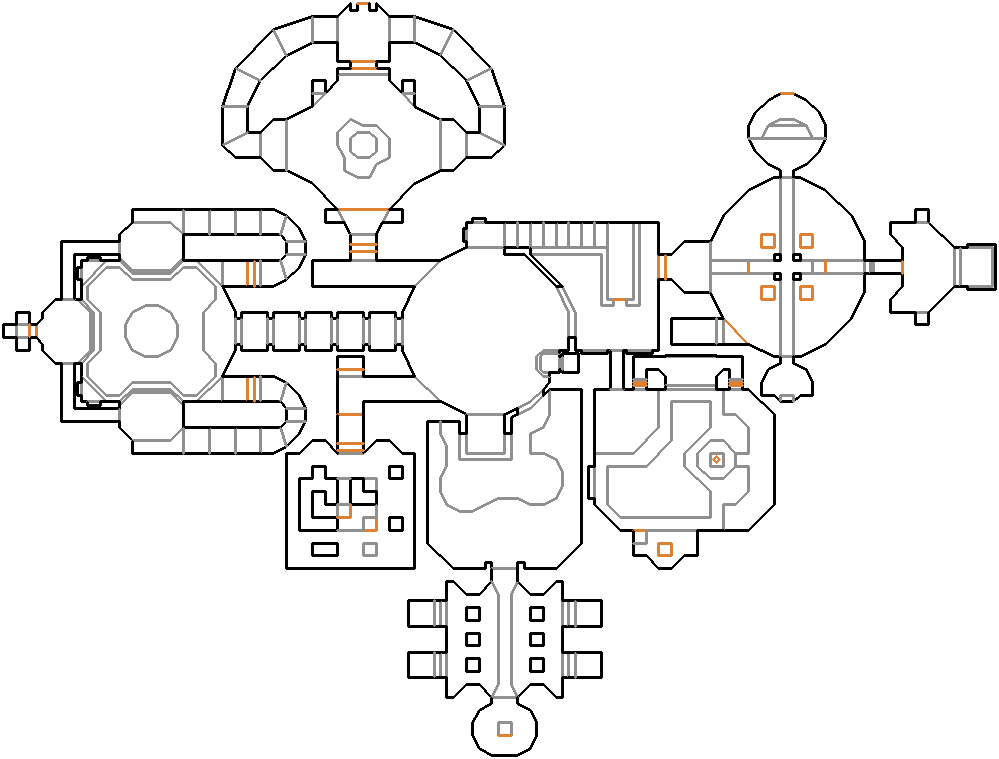
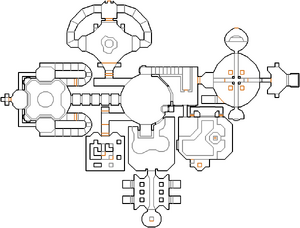
MAP01: Congo (MAP25 in PSX) is the first map of The Plutonia Experiment. It uses the music track "The Imp's Song" from Doom.
Walkthrough
You begin in a room surrounded by sludge on top of some shells. In front of you is a long hallway, with a door to the left and right. Go through either door, up the stairs, and clean out the sergeants at the top. Go to the room with the wall that has a demon face on it. The face is a switch. Hit it, grab the goods, and get out and go through the long hallway into a courtyard.
To the right of you is a hallway and another room leading off the courtyard. Go to the hallway, and at the end a door will open behind you, revealing some chaingunners and a medikit. Go through the door, clear out the chaingunners, and find the box that looks slightly different from the others. This box is a lift. Ride it up, grab the super shotgun, and kill the arch-vile that appears. Exit the room, go back through the hallway, and head right into the room leading off the courtyard. Follow it to the end, where you will see a pillar with a switch. Hit the switch, grab the medikit, and run back out, killing the revenants that follow. Go back in and grab the rocket launcher and rockets that was in the rooms the revenants came out of, and go back to the courtyard. Go forward and up some stairs, keeping an eye out for baddies, and go through the door. you will be on a walkway that leads off to three different paths. Go forward, and kill the revenant that comes up. Go left, hit the switch in the room, and head back out. Go along the path the revenant came up on, and in the room is a chaingunner on your left and right, and a mancubus that will ride up a lift. Kill them, grab the red skull key, head out, and kill the new baddies that should have just showed up. The hallway they came out of is a lift, and you can ride it up for some shells. Go back into the courtyard, and kill the arch-vile on top of the pillar. Go into the last hallway you haven't been to, and you will be in a room with a pillar in the middle, and imps to the left and right on raised platforms. Proceed forward, and some chaingunners will appear behind you. Kill them, then go through the red door. Hit the switch, which lowers the pillar with the blue skull key on it. The switch also revealed two chaingunners, so use your fist to get them to come out. Mash them and grab the key, then exit. Go back up the stairs, and into the hallway that should be in front of you. Kill the chaingunners and mancubi you see, then go through the blue door. Follow the hallway, and come out onto the platform with the Mancubi, then step on the exit pad.
Secrets
Official
- At the east end of the map is a plus-shaped bridge crossing a pit of brown sludge. Walking along the eastern arm of this bridge causes a wall to open in an alcove in the southwest corner of this room. Drop into the sludge beneath the alcove and lower it like a lift to access the box of shells.
Non-official
- At the starting point of the level, take either side doors and ascend to the rooms on the upper floor. The west wall of the western room contains a gargoyle switch. Hit it to access a small cross-shaped cache containing a backpack (the first one of the entire episode), a megaarmor and a box of shotgun shells.
Bugs
- In the room full of crates to the south east of the starting area is an Arch-vile on a lift, which is lowered by two linedefs in the room. It is possible to become stuck on the platform if you get on it after the Arch-vile leaves, but before it raises, as there is no way to lower it from inside.
- There are no items in the map, making it show 0% items were found, some ports ignore this completely.
Screenshots
")
")
")
")
Speedrunning
Routes and tricks
It is possible to bypass any keys by simply straferunning from the ledge with the blue door to your exit. This may take a few tries however.
Records
The Compet-N records for the map are:
| Run | Time | Player | Date | File | Notes |
|---|---|---|---|---|---|
| UV speed | 00:11 | Marijo "Sedlo" Sedlic | 2002-10-15 | Template:Competnftp | |
| NM speed | 00:38 | Xit Vono | 2002-09-24 | Template:Competnftp | |
| UV max | 02:14 | Radek Pecka | 2001-12-26 | Template:Competnftp | |
| NM100S | 01:05 | Jakub "method_man" Razak | 2003-07-31 | Template:Competnftp | |
| UV -fast | 02:27 | Radek Pecka | 2002-04-28 | Template:Competnftp | |
| UV -respawn | 02:26 | Radek Pecka | 2002-04-28 | Template:Competnftp | |
| UV Tyson | 24:43 | Xit Vono | 2003-02-05 | Template:Competnftp | |
| UV pacifist | 00:11 | Marijo "Sedlo" Sedlic | 2002-10-15 | Template:Competnftp |
Statistics
Map data
| Things | 165 |
| Vertices | 989 |
| Linedefs | 1130 |
| Sidedefs | 697 |
| Sectors | 133 |
Things
| Monsters | ITYTD and HNTR | HMP | UV and NM |
|---|---|---|---|
| Sergeants | 10 | 6 | 6 |
| Imps | 8 | 7 | 9 |
| Demons | 0 | 4 | 0 |
| Troopers | 2 | 0 | 0 |
| Cacodemons | 0 | 1 | 1 |
| Arch-Viles | 0 | 2 | 2 |
| Pain Elemental | 1 | 1 | 1 |
| Chaingunners | 14 | 17 | 18 |
| Revenants | 3 | 1 | 5 |
| Mancubi | 2 | 3 | 4 |
| Powerups | ITYTD and HNTR | HMP | UV and NM |
| Backpacks | 1 | 1 | 1 |
| Stim packs | 12 | 10 | 7 |
| Medikits | 6 | 5 | 5 |
| Green armors | 1 | 1 | 1 |
| Blue armors | 1 | 1 | 1 |
| Weapons | ITYTD and HNTR | HMP | UV and NM |
| Rocket launchers | 1 | 1 | 1 |
| Super shotguns | 1 | 1 | 1 |
| Ammunition | ITYTD and HNTR | HMP | UV and NM |
| Shells | 7 | 7 | 7 |
| Rocket boxes | 4 | 4 | 4 |
| Shell boxes | 5 | 5 | 5 |
| Keys | ITYTD and HNTR | HMP | UV and NM |
| Red skulls | 1 | 1 | 1 |
| Blue skulls | 1 | 1 | 1 |